Hints and Instructions: Valdo's Puzzle Box
General Hints
Tip
For this puzzle box we advice using pen and paper to note down your progress. Otherwise, it is hard to keep track of everything.
Hint 1
The goal is to open the puzzle box and reveal its content.
Hint 2
Firstly, you will have to solve a series of puzzles. The aim of the first puzzles will be to unlock all four acrylic sliders at each edge of the box.
Hint 3
Lastly, you can detach the acrylic lid on side E which reveals the final puzzle.
Troubleshooting
Slider stuck?
Valdo's Box is a sequential puzzle box, meaning it can only be solved in one specific order. Each step builds upon the previous one.
With this in mind, first, ensure that the horizontal slider from the previous step is moved completely to its solved position.
Second, check the position of the vertical acrylic sliders. If the vertical acrylic slider next to the current puzzle is not in the top or bottom position, the horizontal slider cannot be moved.
Power
Hint 1
This puzzle requires power to reveal all the clues. Can you figure out how to power it?
Hint 2
Can you find a big wheel that you can turn left and right?
Hint 3
Did you find the wheel on side F? Turn it right and left. But not too slow.
Solution
By turning the big wheel on side F left and right, you should see the box starting to flash.
By continuing to turn the wheel the box charges up until the lights turn to a solid green. This means, it is fully charged.
After you stop charging, the box slowly discharges until the lights stop flashing.
Puzzle I
Hint 1
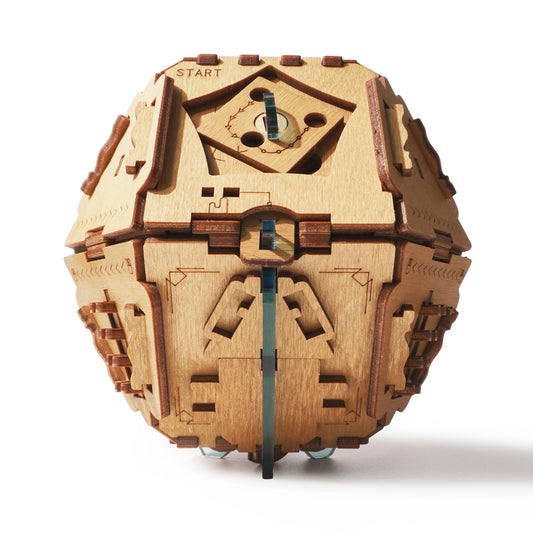
Find the word "START"
Hint 2
Did the leaver on side F next to the word "START" release something?
Hint 3
What can be weighed?
Hint 4
There are 6 keys in 6 keyholes on side C. Pull them out.
Hint 5
There is a metal pin on side C, that can be pulled out. Try weighing the keys with the weighing device and this pin.
Hint 6
The keys cannot be weighed by attaching them from the front to the weighing device. Did you try attaching them from the side?
Hint 7
Sort the keys in ascending order. From light to heavy.
Hint 8
You now need to find out which key belongs into which keyhole.
Hint 9
Can you find the symbols inside the key hole somewhere else? Also look for shapes.
Hint 10
Did you find very similar looking shapes on the side with the two vertical acrylic bars in the middle and the 6 sliders next to them (side B)?
Hint 11
Can you make the two vertical acrylic bars in the middle light up?
Hint 12
Did you press more than one slider up at once?
Hint 13
What does the triangular/ arrow shaped symbol in the middle mean when the acrylic bar lights up behind it?
Hint 14
Does this triangular symbol remind you of some sybol in math? For example when comparing one side of an equation to the other.
Hint 15
Compare the shapes on the sliders. Can you find an order and what does this order tell you?
Hint 16
Does this order relate to the weighed keys?
Hint 17
Finally, you should have found an ascending order for the keys (light to heavy) and an ascending order for the symbols. Place the keys into the keyholes corresponding to order of the symbols.
Hint 18
After placing all 6 keys in their correct key hole you should be able to move the middle horizontal wooden slider to the left. Does this free something else?
Hint 19
You should now be able to move the first vertical acrylic slider on the edge of the box to the unlock position. It is the slider on the right to the keys holes.
Solution
On side F, next to the word "START," there is a lever. Push it to release the "weighing bar" from side B and pull it out. This device is used for weighing.
On side C, pull out all six objects. Still on side C, in the middle, there is a metal pin. Pull on it.
Now, attach the six objects pairwise to the magnets on the left and right side of the weighing bar. Attach them from the side (not from the front). By sliding the middle part of the bar onto the metal pin on the puzzle box, you can weigh the six objects and determine the order from the lightest to the heaviest.
On side B, there are six vertical sliders, each connected to a button. Each slider represents a symbol found in the six holes on side C. Charge up the box and press one slider from each side at the same time. A blue light will indicate which side is heavier, shown by the greater/smaller symbol in front of the light.
Test all slider combinations and note down the relationships between the symbols. By combining all the information gathered, you will be able to determine the sequence of symbols from the heaviest to the lightest.
Finally, place the weighed objects back into the holes from the heaviest to the lightest.
The solution is shown below: Number 1 represents the lightest object, and Number 6 the heaviest.

Puzzle II
Hint 1
Next puzzle to solve is the one side D.
Hint 2
On this side, can you move one of the two horizontal metal pin sliders? If not, check if the vertical acrylic slider, you ulocked in the previous step, is moved fully to the unlock position.
Hint 3
Moving the bottom horizontal slider to the left should release all 4 vertical metal pin sliders
Hint 4
Did you pull out the small acrylic plate, which was held in place and locked by the 4 vertical metal pin sliders?
Hint 5
On the acrylic plate, do the two holes match up with the engraving on side D?
Hint 6
When the holes align with the engraving, what does this tell you?
Hint 7
While following the net of arcs originating from the bottom, what does this tell you about the 4 metal pin sliders and their positions?
Hint 8
Before starting to follow the net of arcs. slide all 4 vertical sliders to the zero position.
Hint 9
Did you follow the arc until the end? The small acrylic plate tool should help you decide which path to take at each intersection. You might also need to flip over the acrylic plate.
Hint 10
Along the way on this path you will come across some symbols, which are written next to the corresponding path.
How should you move the 4 vertical sliders according to the symbols?
Hint 11
After moving all four vertical sliders to the correct position, you should be able to move the top horizontal pin slider to the left. If not try to adjust the four vertical sliders a little bit. Sometimes, they have to be wiggled a little bit so that they align perfectly.
Hint 12
After the top horizontal pin slider is moved to the left, it should unlock the next vertical acrylic slider on the edge to the right of this puzzle.
Solution
- Move the bottom horizontal slider to the left. This should release all four vertical metal pin sliders.
- Move the vertical sliders down and remove the clear acrylic tool. Align the holes in the clear acrylic tool with the circular markings next to the junctions of the lightning arc engraving. You can also try flipping the tool over to the other side. Move all four vertical sliders to the 0 position. Next, starting at the bottom, use the clear tool to trace the path until you reach the end. The arrow on the tool will align at every junction in only one direction. Along the way, you'll encounter instructions corresponding to each slider, indicating whether to move the slider one position up or one position down. After reaching the end, the four sliders should be in the positions shown in the picture below.
- Now, the top slider can also be moved to the left.

Puzzle III
Hint 1
Next puzzle to solve is the one with the clock face on side A.
Hint 2
Look into the middle of the clock face. Did you spot the engraving inside the hole?
Hint 3
What tool do you already have, which looks similar to this engraving?
Hint 4
Try moving the three acrylic discs inside the hole so that they all allign and free the gap. Maybe you can use the magnet at the ends of your weighing tool?
Hint 5
Can you press the leaver inside the hole with the tool? Does this release something?
Hint 6
The first object that was released is a card with new clues. Did you also get the second object? Look through the translucent top on side E. Do you see the shape of a clock hand?
Hint 7
Let the clock hand fall out of the hole in the side and put it onto the clock face. Check that the engraving on the dial is facing towards you.
Hint 8
Do the shapes or parts of the shapes engraved on the new card you retrieved look familiar?
Hint 9
Compare the shapes to side B.
Hint 10
Can you use side B again to help you decode this puzzle? What can be compared this time?
Hint 11
Did you try pressing more than one slider per side?
Compare two shapes with two other sapes to find a sequence.
Hint 12
After you have found the sequence, can you tell how to rotate the clock dial? Do you rotate clockwise or anti-clockwise from step to step?
Hint 13
Do the arrows above the clock face give a clue about the direction of rotation?
Hint 14
After inputting the correct sequence into the clock, you should be able to move the horizontal slider under the clock from left to right.
If the slider does not move, please check out the troubleshooting section at the top.
Hint 15
After moving the horizontal slider to the right, this should unlock the next vertical acrylic slider rithe of the clock face.
Solution
First, you will need to release another clue. Underneath the clock face, there is a magnet connected to the top clear disc.
Use the magnet on the weighing bar to move the three discs so that an opening appears at the top. Insert the weighing bar into this opening. This will release a card-like object just above the clock face. Additionally, by removing the card-like object, the clock dial can also be extracted from underneath the clear acrylic on side E. Place the clock dial onto the clock face.
On the card-like object, there are four times marked: 3, 6, 9, and 11 o'clock. Next to each marking, two shapes are drawn. These shapes correspond to the shapes of the six sliders on side B. By pressing two shapes at once on each side simultaneously, you can find an order. The logic is the same as in puzzle 1.
The correct sequence for the clock is 3 -> 6 -> 11 -> 9, first turning counterclockwise from 3 to 6, then clockwise from 6 to 11, and finally counterclockwise from 11 to 9.
After inputting the correct sequence into the clock, you should be able to move the horizontal slider under the clock from left to right.
If the slider does not move, please check out the troubleshooting section at the top.


Puzzle IV
Hint 1
After solving the puzzle with the clock face on side A, can you find another slider that is now free to move?
Hint 2
Did you find it on side B? After moving this slider to the other side, you should now see a reverse symbol. What does this mean?
Hint 3
Maybe you now need to go backwards instead of going forward?
Hint 4
Trace back your steps.
Hint 5
Move the middle slider on side C to the right to free the last vertical acrylic slider. But how can this be done?
Maybe all horizontal sliders can only be moved sequentially.
Solution
Slide every horizontal slider back to its original position. (against the direction of the arrows). In order to achieve this, you need to go back step by step. (In the reverse order you solved the puzzle). Leave the slider with the reverse symbol in the position showing the symbol.
In addition, while going back, leave the vertical acrylic sliders in the unlocked position.
After all horizontal sliders have been moved back, the last vertical acrylic slider should now be able to move to the unlocked position.
Can you now take off the translucent acrylic lid on side E?
Puzzle V
Hint 1
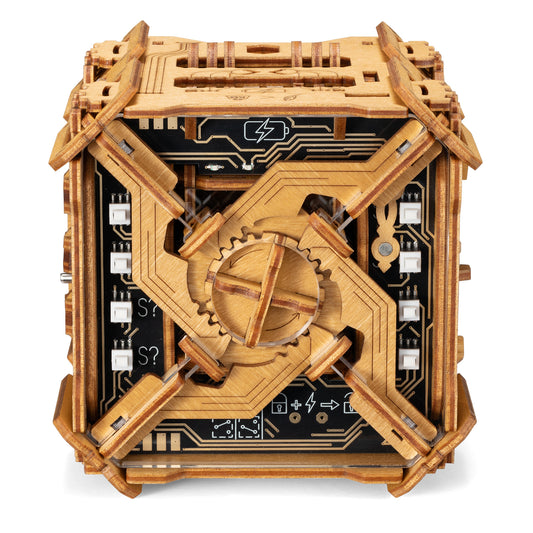
This puzzle is revealed after taking off the translucent acrylic lid. It is the puzzle with the 8 buttons on the printed circuit board.
Tip: Use your pen and paper! You need to write down your progress.
Hint 2
Did you find the clue engraved on the under side of the lid?
Hint 3
Are there similarities between the engraving on the under side of the lid and the markings on the printed ciruit board?
Hint 4
Can you figure out which four buttons to press simultaneously, that give power to the electronic lock?
Hint 5
On the under side of the lid, there is a small electronic circuit diagram engraved. Can you find the button that lights up the first light?
Hint 6
What happens if you press simultaneously the button, that lights up the first light and one of the other buttons? Does the light turn off in some combination? What does this tell you?
Hint 7
Can you continue this logic for the remaining lights? Try pressing combinations of buttons to light up one light after each other. In the end you should know which four buttons power the electronic lock.
Hint 8
Make sure you have enough power for activating the electronic lock. Charge up the box until it lights up green.
Solution
First, charge up the box until it lights up green. Then, press the 4 buttons shown on the picture below to unlock the electronic lock.
(Make sure the circuit board is not up side down relative to you)
After pressing all 4 buttons simultaneously, the small box in the middle should be released. Pull it out.

Puzzle VI
Hint 1
You should now hold a small box with an acrylic top and bottom in your hand.
Hint 2
One of the acrylic sides can be removed. But how?
Hint 3
On one side of the small box there is an arrow engraved. Can you find another arrow somewhere else on Valdo's Box?
Hint 4
Try placing the small box back inside Valdo's Box. Check the arrows!
Hint 5
After placing the small box inside Valdo's Box with the arrows on the same side and same orientation, try pulling on the slider of the small box.
Make sure the Valdo's Box is standing on a horizontal surface. Sometimes the magnets struggle to release the mechanism inside the small box if the box is at an angle.
Hint 6
The clear acrilic side, that was held in place by the slider, can now be removed.
Congratulations! You solved the Valdo's Box!
Quick Access Instructions Tesla Box (Identical for Valdo's Box)
Reset Instructions Tesla Box (Identical for Valdo's Box)
Our Best-Sellers
-
Anti-Gravity | Puzzle Box | Escape Room Game (Metal Version)
Regular price €52,90Regular priceUnit price per -
Houdini Box | Electronic Puzzle Box | Escape Room Game (PRE-ORDER)
Regular price €79,90Regular priceUnit price per€90,00Sale price €79,90Sale -
Philosopher's Stone | Puzzle Box | Escape Room Game
Regular price €44,90Regular priceUnit price per -
Tesla Box | Electronic Puzzle Box | Escape Room Game
Regular price €64,90Regular priceUnit price per


